One of my goals for a while now has been to be able to take something from idea all the way through to creating a tangible, physical object using something like Blender for visualization/modeling and 3d printing the results and then painting.
My initial idea was either a robot or a spaceship, maybe something retro looking. After getting some inspiration from Pinterest, I did some sketching and then after coming to a design that worked for me (where “worked” meant it wasn’t too complicated and I thought I could model it). Then, it was off to Blender to work on the modeling. The result after multiple iterations was this:
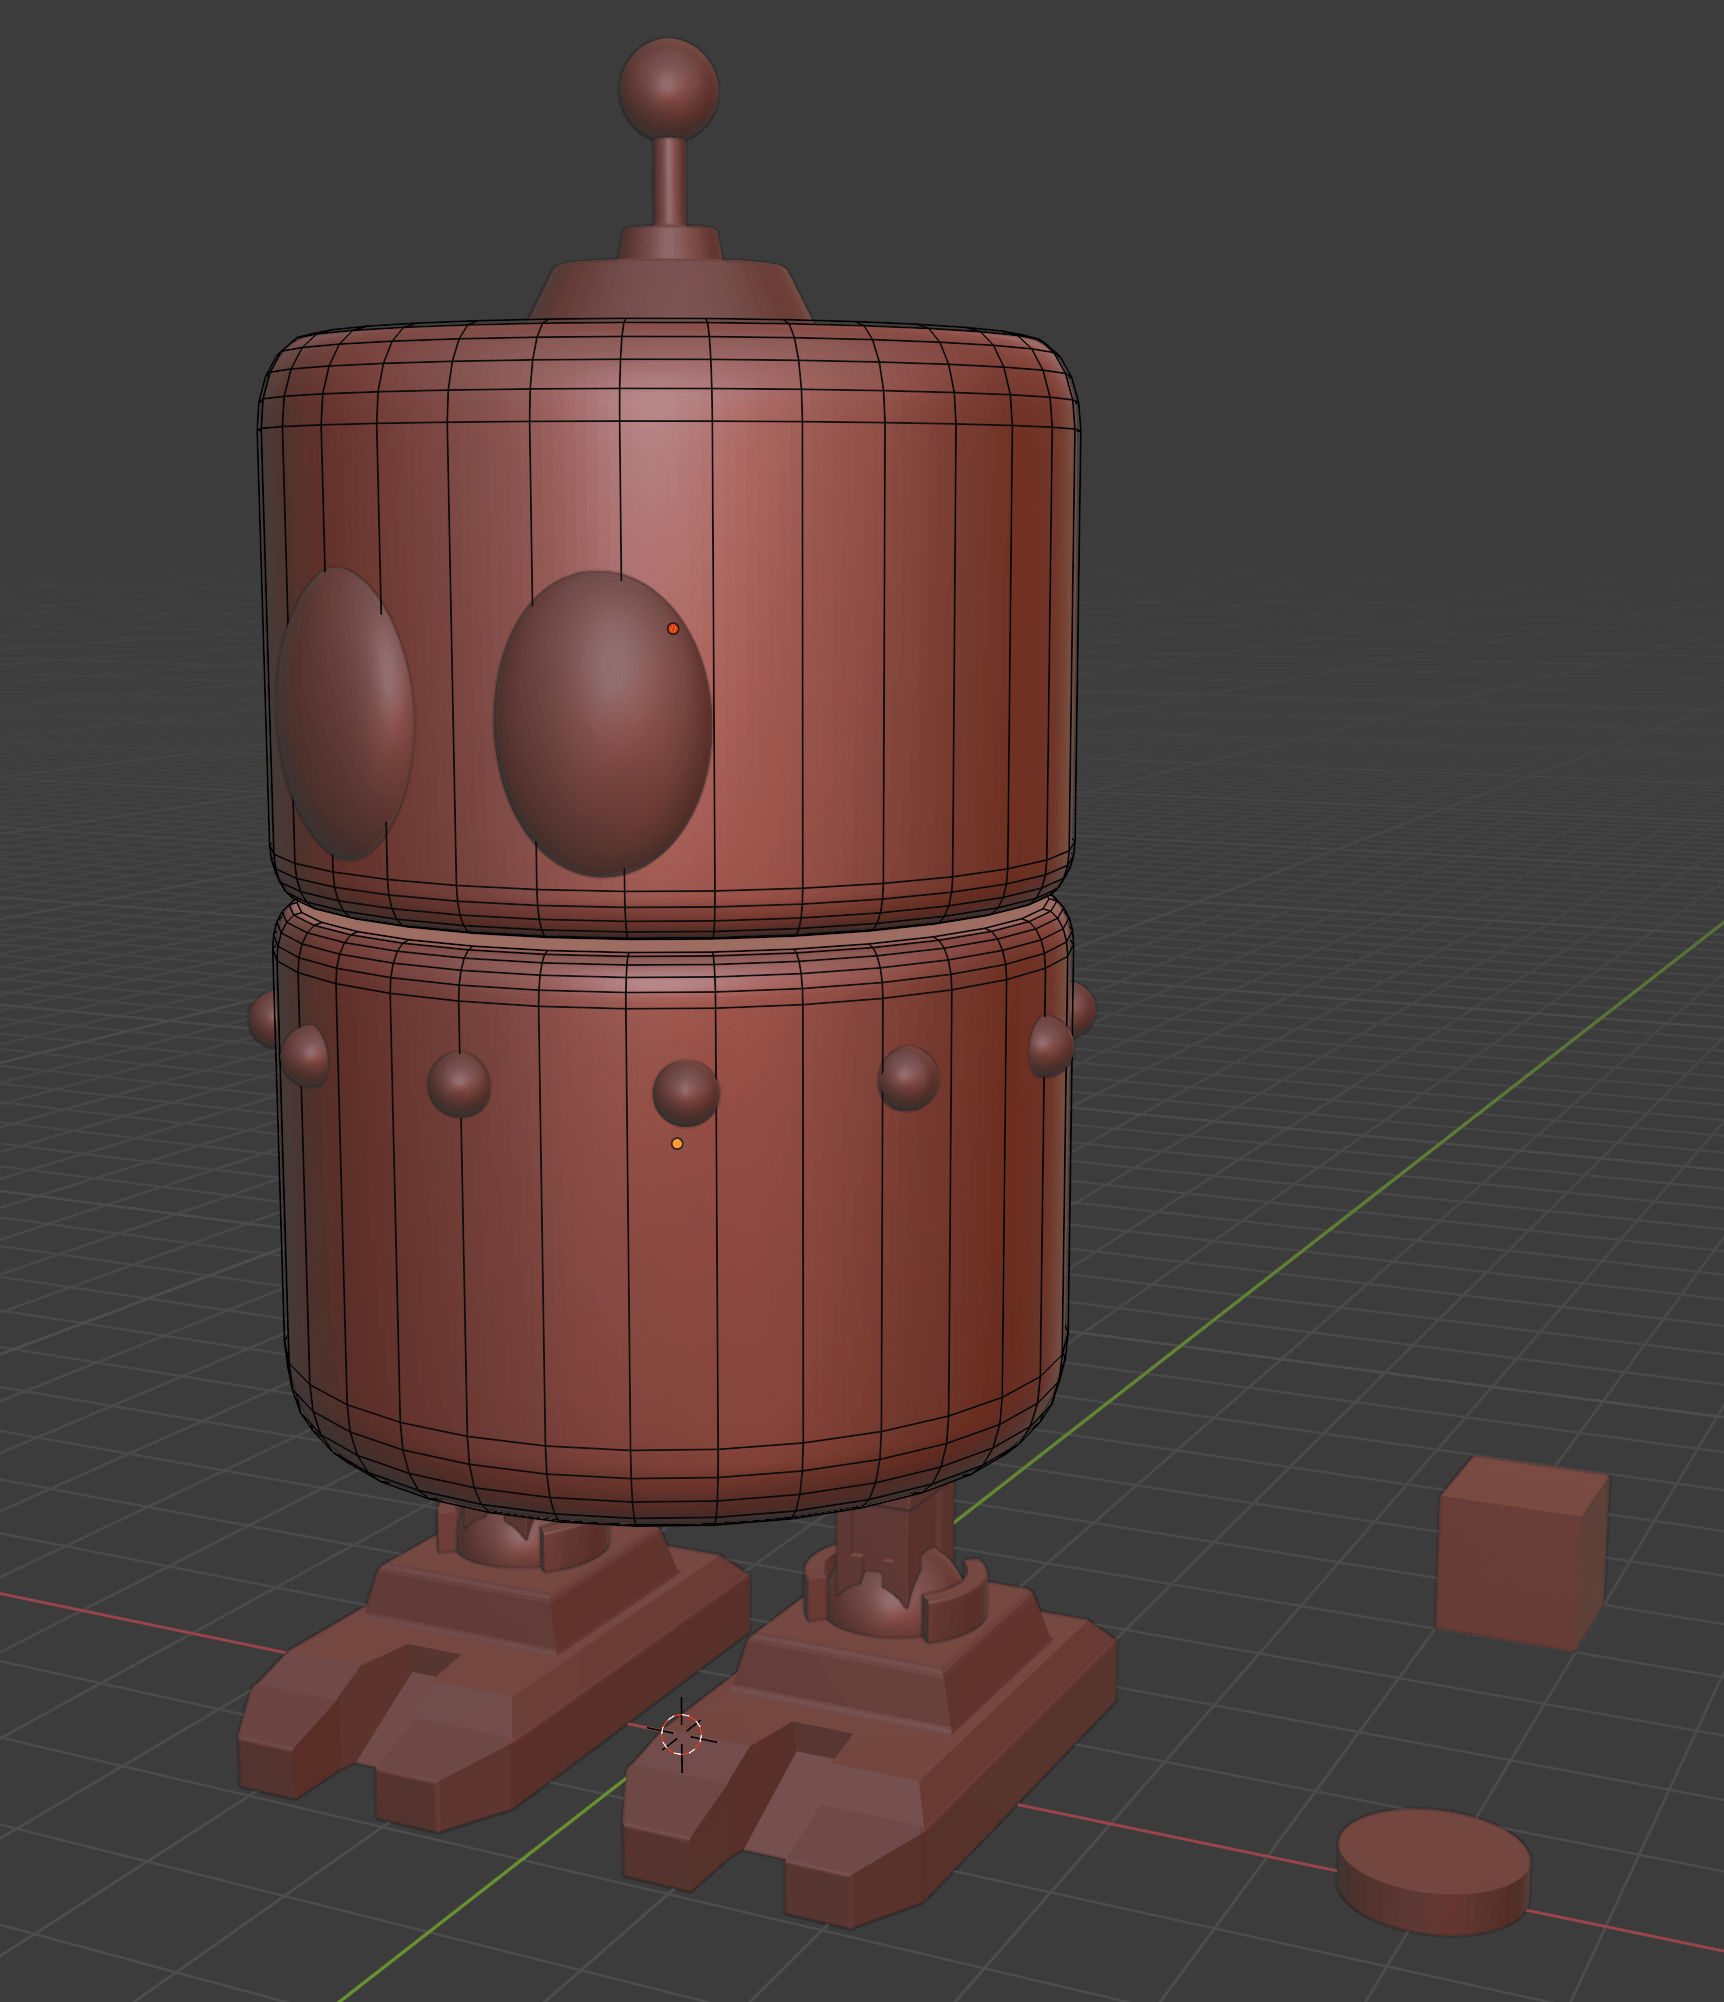
What you can’t see in this picture is that the top and bottom halves have small recesses the size of the disc at the bottom right. That’s the size of the magnets which would eventually be inserted in the top and bottom halves, allowing you to swivel the top half to give at least a bit of articulation.
Then it was off to the 3d printer. I used an FDM (Fused Deposition Modeling – or FFF, Fused Filament Fabrication) printer which basically melts plastic and extrudes it in layers, kind of like a tube of toothpaste, layer by layer, building it up from the ground up. There are different printers that have different tradeoffs and I knew that this method would leave layer lines, but I hoped to hide those and, for the most part, I was successful.
The first step in that process was to give it a couple of coats of a filler/primer with sanding in between to help fill some of that.
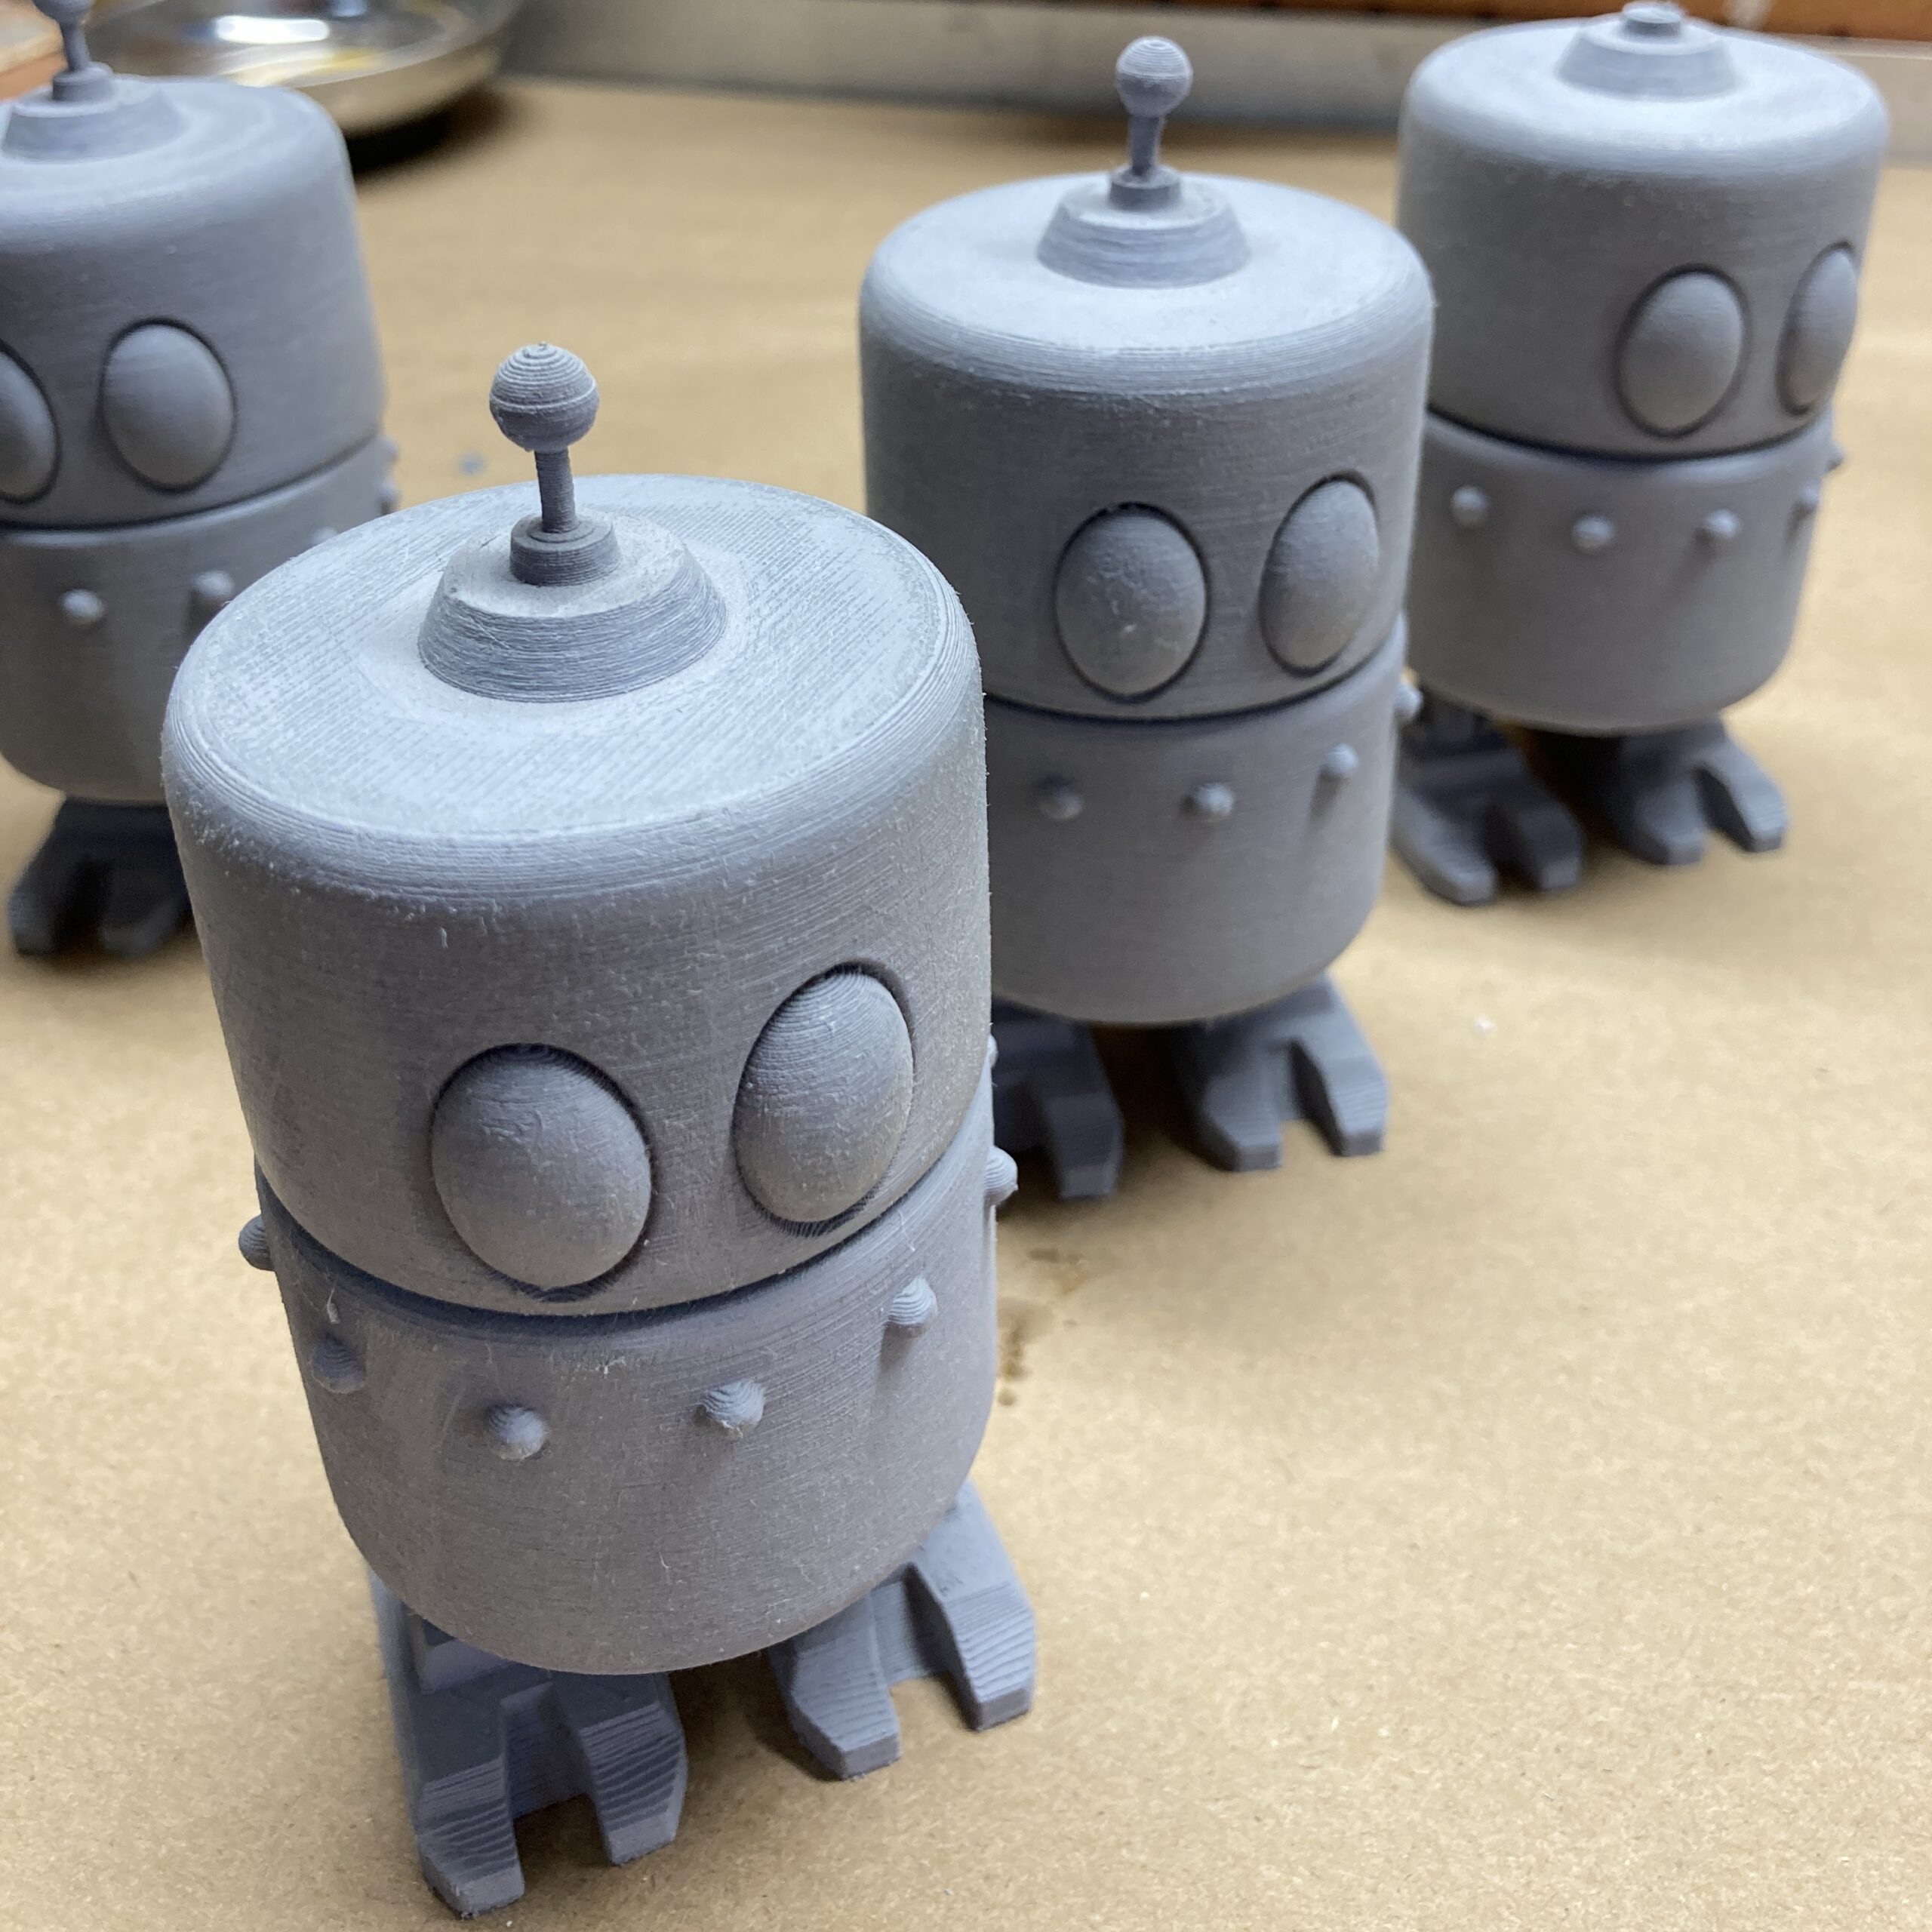
Layer lines are difficult to remove in these kinds of printers and require a lot of patience and time and given that was not the main focus of this project and also because if I were to make more of these, I’d try and make it on a resin printer and have fewer issues with layer lines, I moved on.
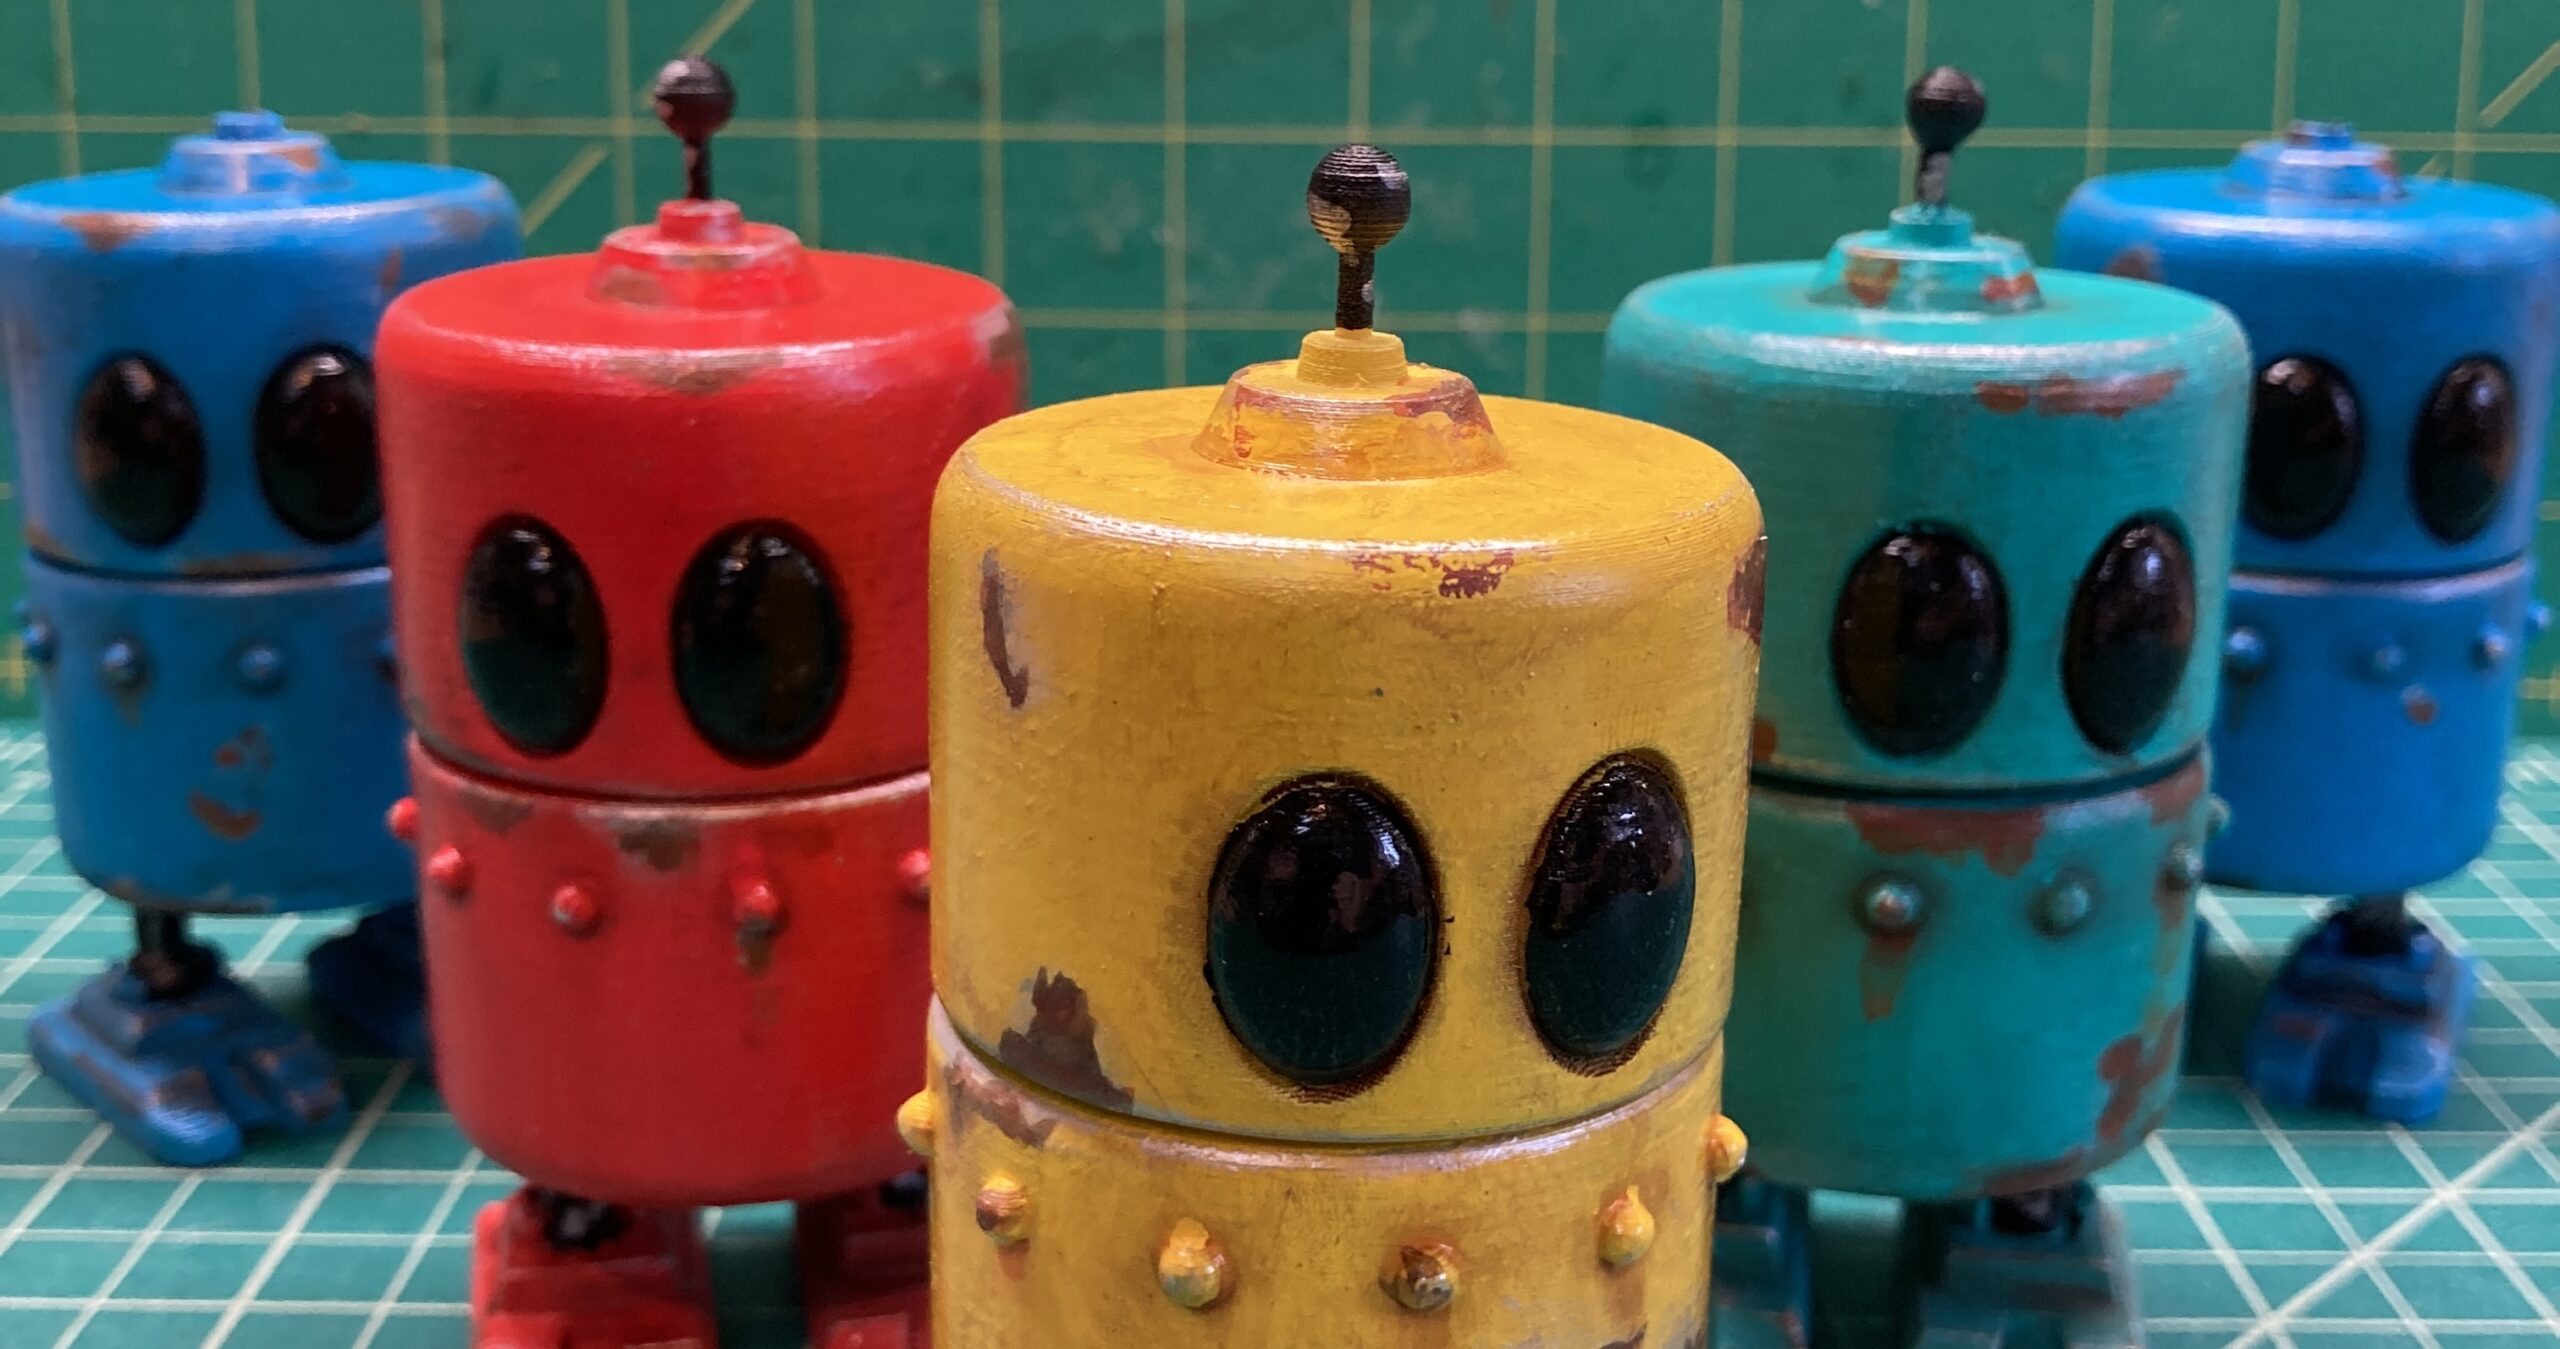
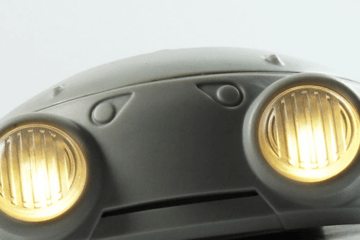
Next was paint and I chose four different primary colors which seemed like something you’d find on a vintage, 1950s or 1960s toy robot.


These were way too new looking and shiny. Now it’s time to weather them!
The first step was to add some silver showing through from the wear and tear these little guys would have suffered over the years. Then adding some rust colors from the metal being exposed to the weather. Then, finally adding some washes to give it a patina. Oh, and the eyes were painted black to make them more toy-like.
You might notice that the blue ones don’t have antennae on the top. One of the lessons is the limits of how small I can make things without them becoming overly fragile. Because the tops of the antenna balls required supports, removing those supports was hard and two of them didn’t make it through. Oh, well, I kept them in as an exercise in painting and because I figured after 50 years, it was good odds a few antennae wouldn’t have lived through the abuse.
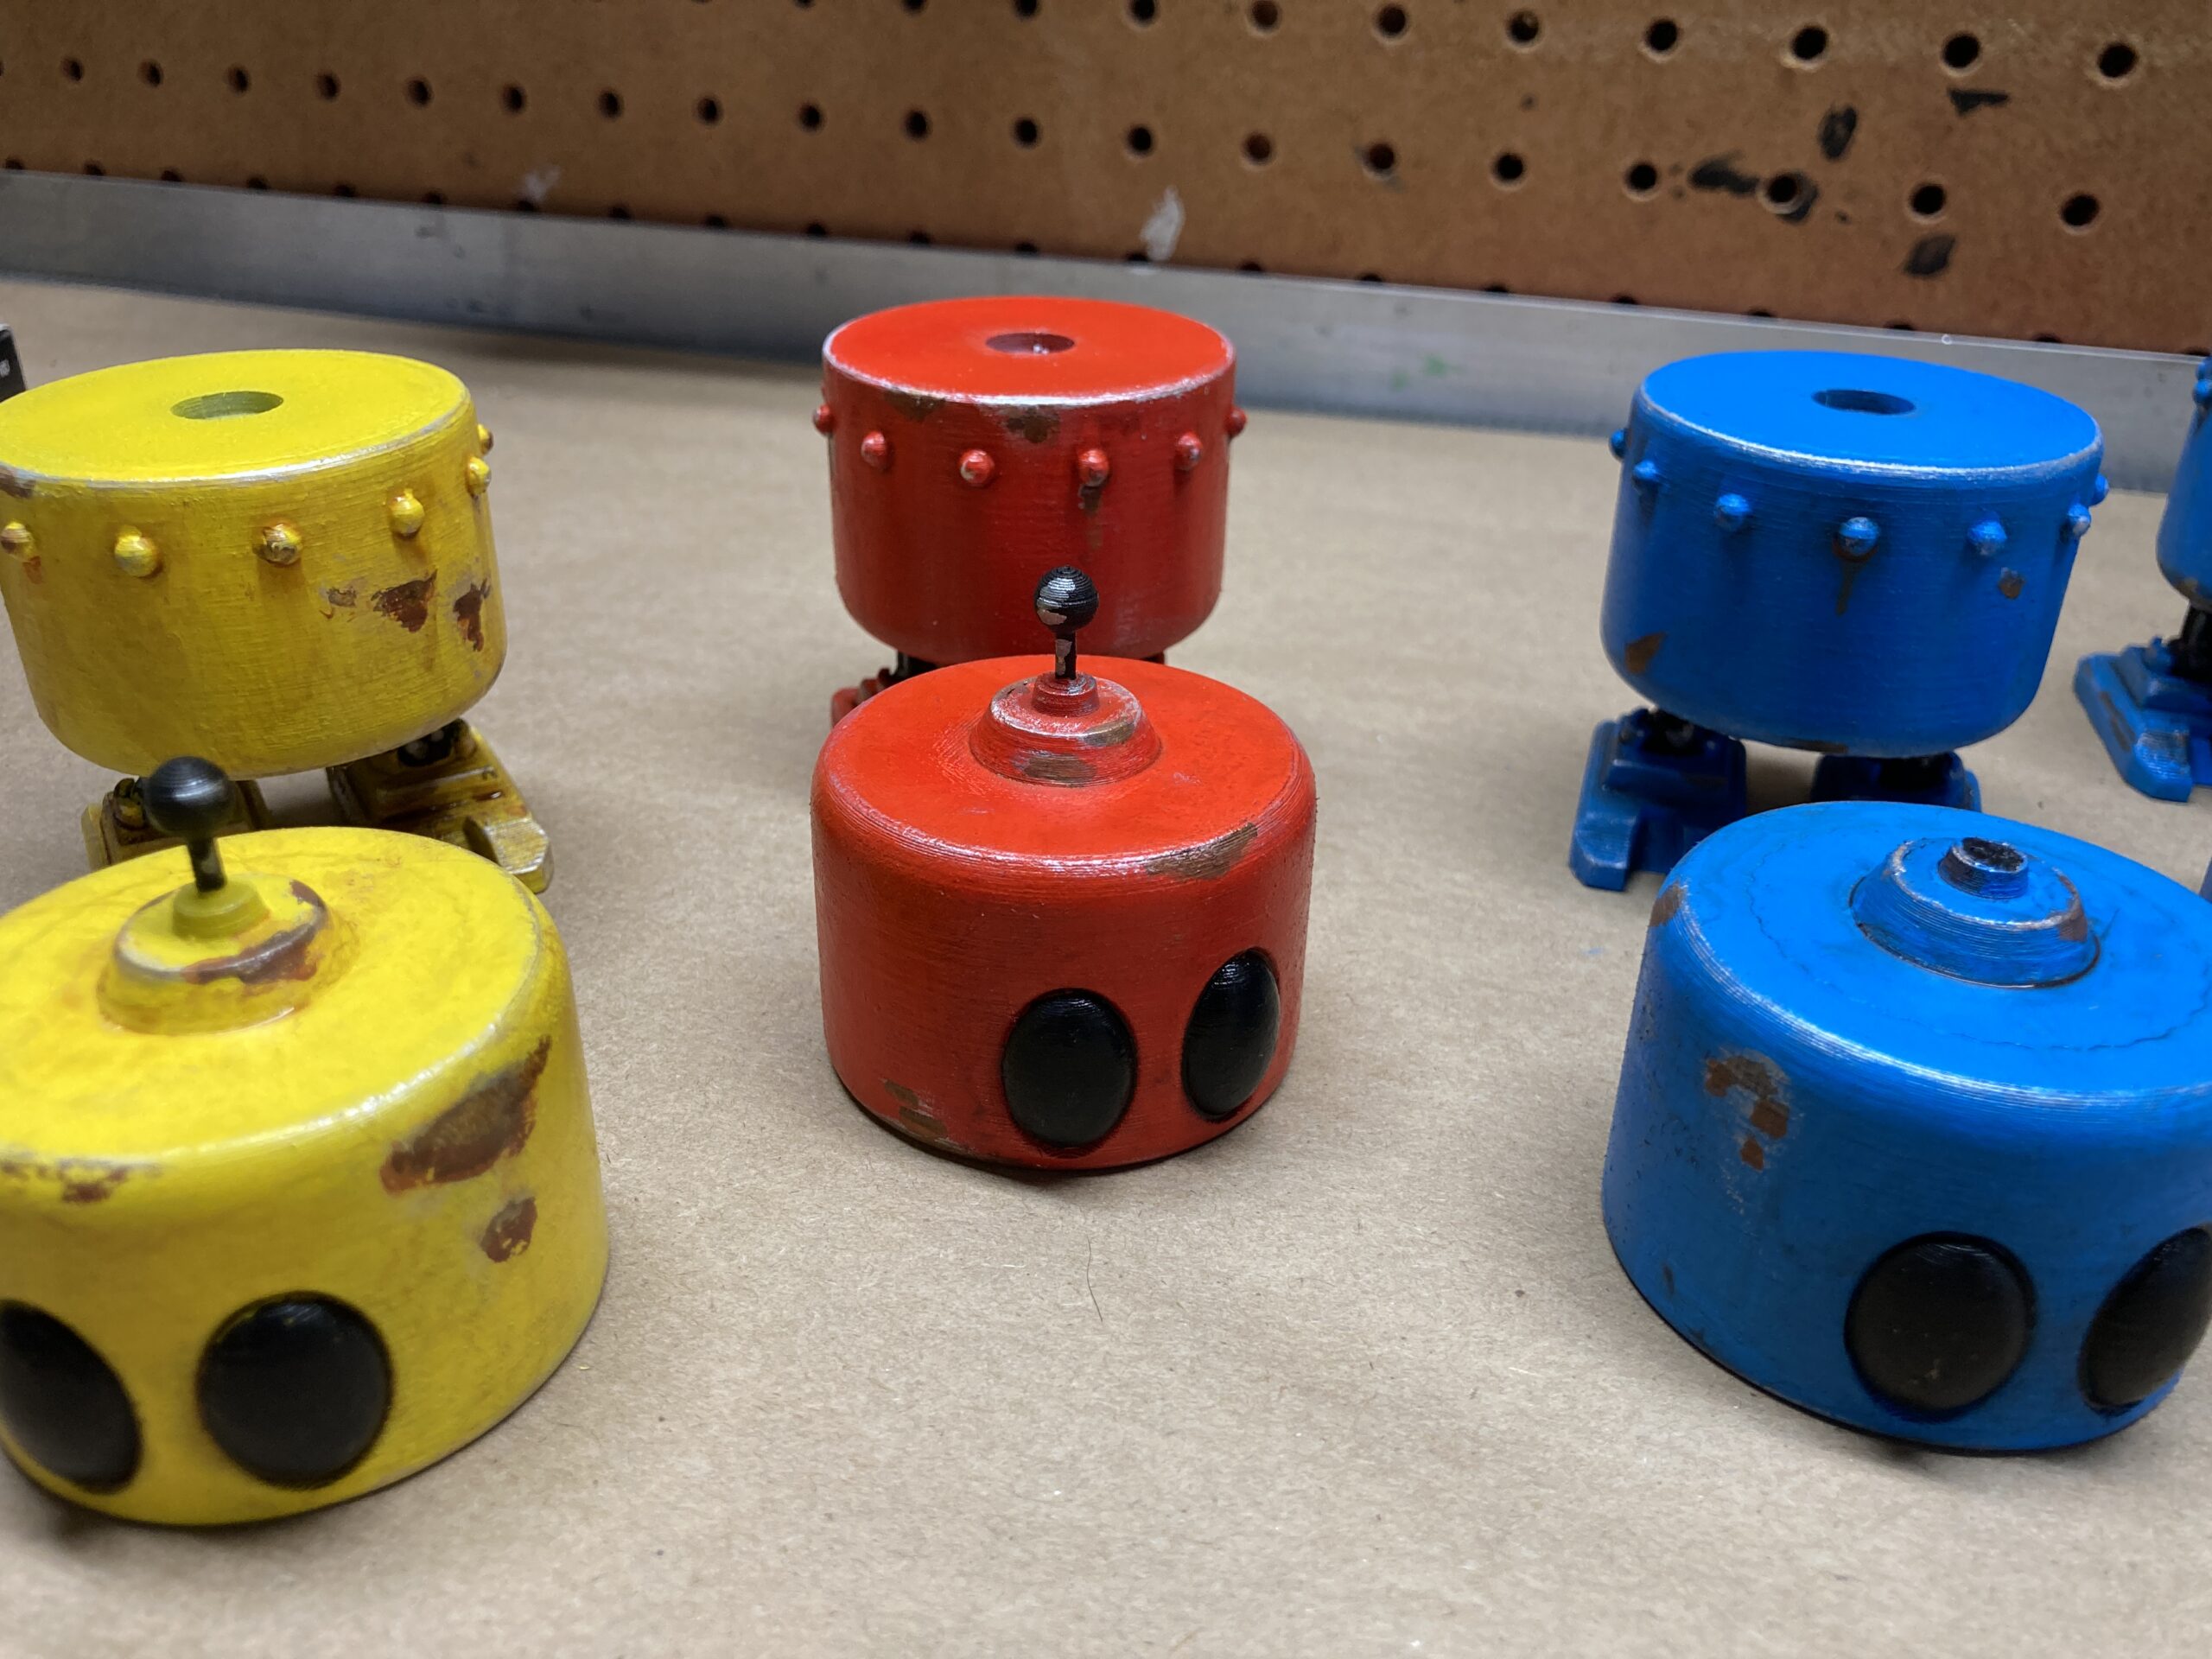
The final steps were to put some clear coat on them to protect them. Then, to glue in the magnets to secure the top and bottom halves together.
And, here I goofed. Somehow, in my rush to do both the top and bottom halves, I managed to glue in the magnets on the tops backward so they repelled the bottom halves. Sigh. If I’d taken my time and glued the bottom halves, let them dry then used that to verify the polarity on the magnets, I’d have avoided the problem. Or, if I’d been more rigorous in my process, which is a recurring problem.
In any case, they are done now and I’m pretty happy with the results. I was asked the same question I seem to get after I finish a project like this: “What are you going to do with them?” I don’t know. For now they sit on my shelves, staring at me. Would a few sell on Etsy? Probably/Maybe. But, even though I know it’d be faster if I printed them in resin and made some optimizations to make them a bit sturdy, there’s no way I could charge enough to reasonably cover time and materials. Plus, now that I’ve completed this project, I want to do the next project and it’ll be different than this one, but I learn things each and every time I complete a project and that, more than anything, is the joy for me right now.
Here are a couple of glamour shots of the final project.


0 Comments