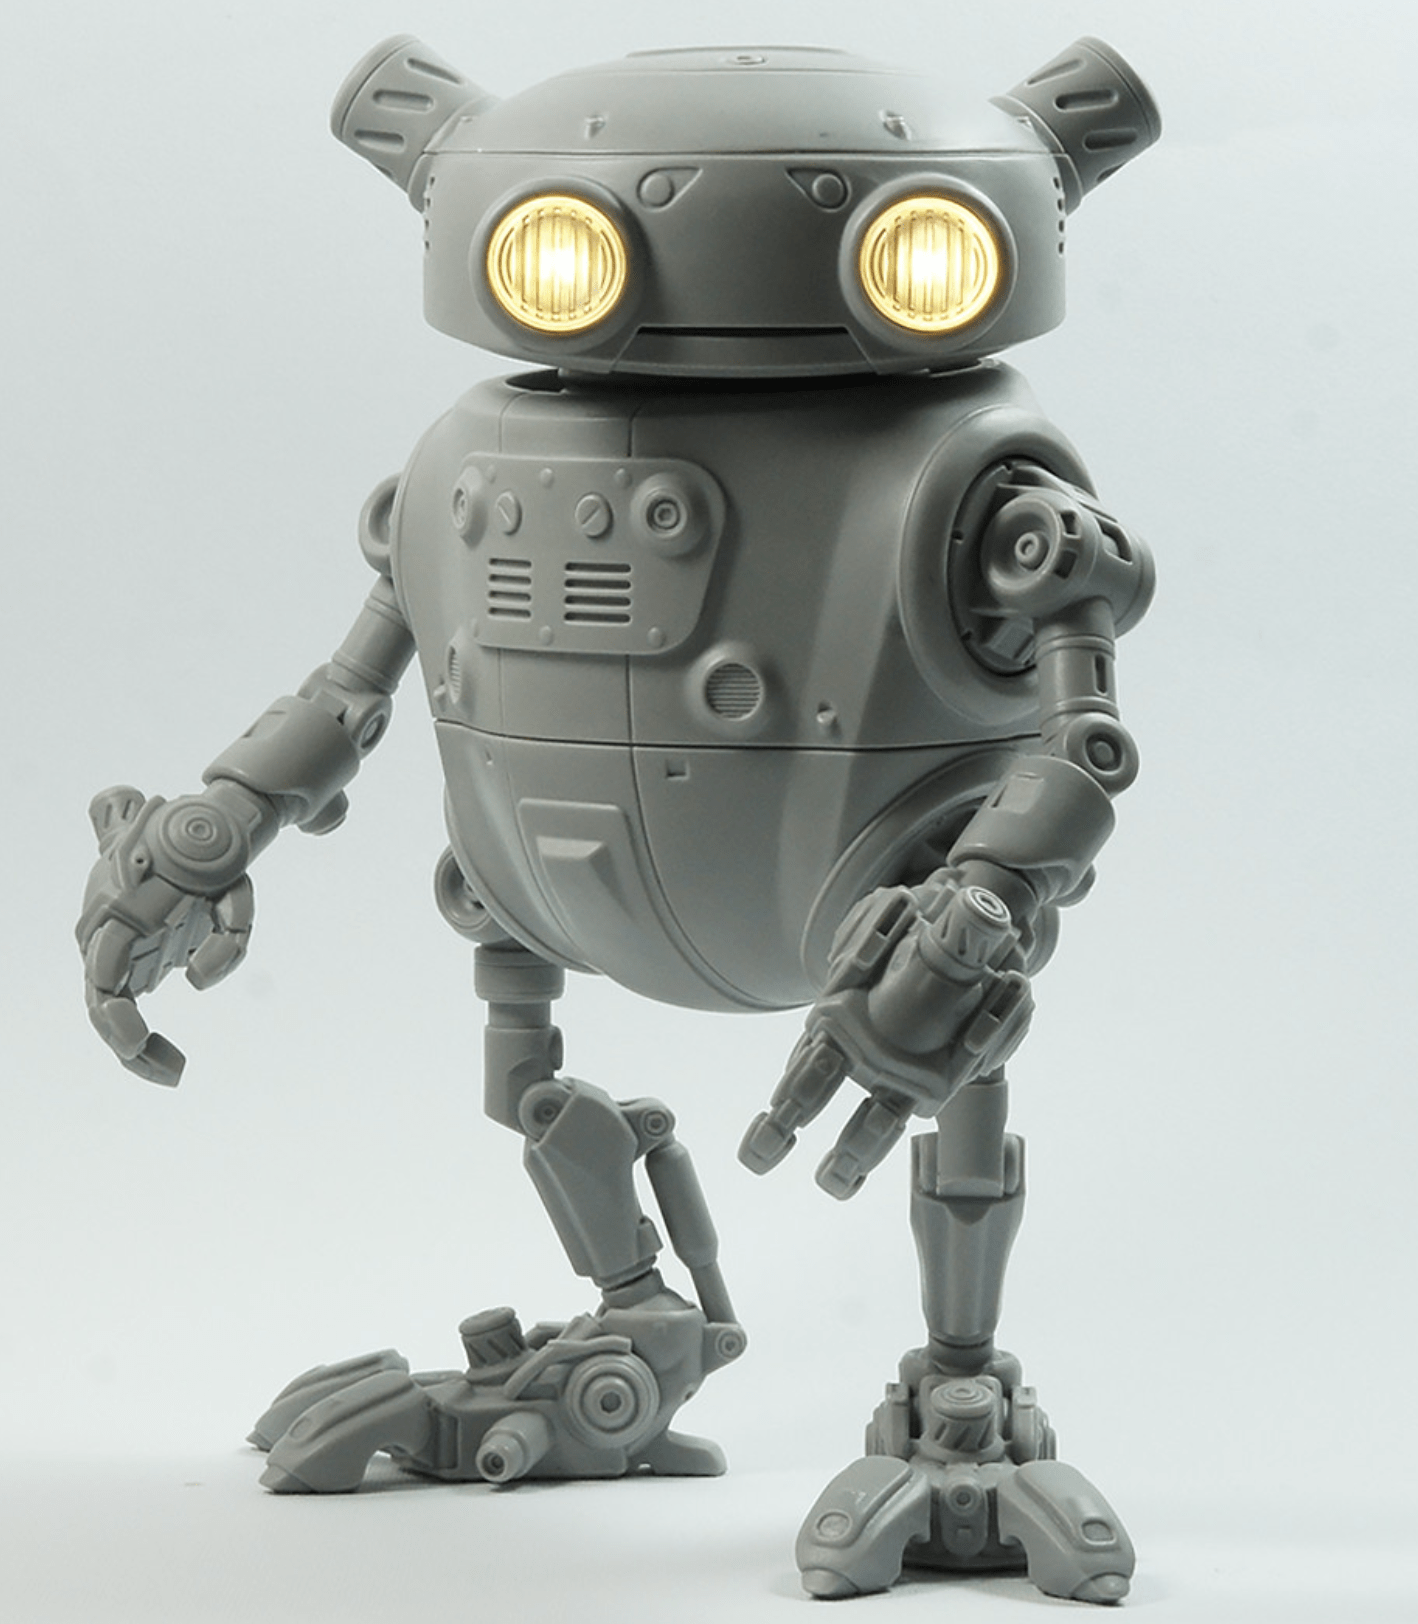
Some months ago, I ran across a robot that I thought looked cool that would be fun to paint. The name of the artist is Paul Braddock. Initially I found him here. But, it’s a resin model that isn’t available and costs $170 for the model, which was more than I was likely to spend. Instead, I purchased and purchased the .stl files for the model which would allow me to print my own robot AND HAVE MY WAY WITH HIM!
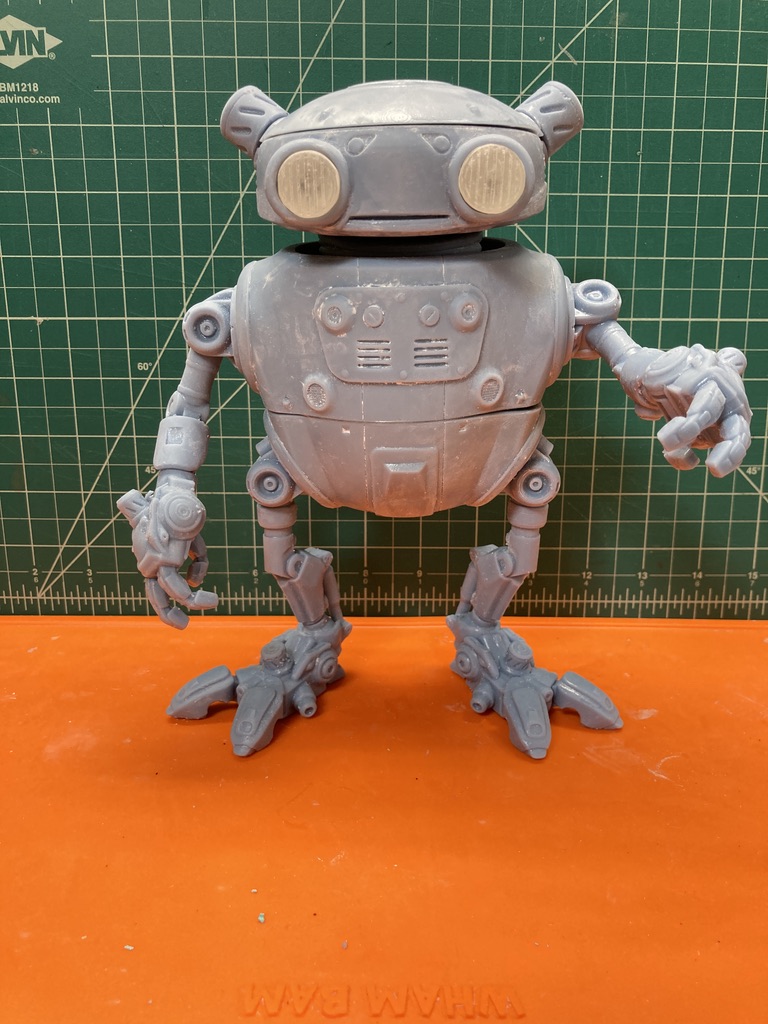
At roughly 9.5″ tall, he was the largest model I’d printed. There were, I think, eleven separate parts (eyes, arms, legs, crown, head, neck, torso upper and lower) and most printed fine, though I did have to pause a print to add more resin which caused a line in the print which had to be fixed as part of post processing. And, to be clear, the quality of my resin print was probably not as good as the professional resin model kit would have been. But, as with most of these kinds of projects, I learned a lot in the process.
I really love the design and the artist was very clever in his use of magnets for the shoulders, neck and top of the head which would allow some posing and allow room for batteries and lights to light up the eyes. I mean, come on! 3D Printing, magnets, lights and painting. My kind of project.
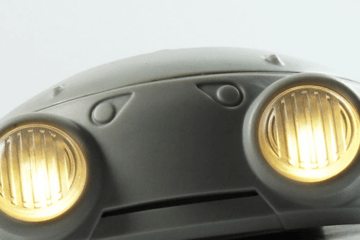
Here is my first pass at cleaning up the print with no paint. Some of the white was just resin that needed to be cleaned off. The eyes are printed with translucent resin so they would react like headlights with the lights behind them.
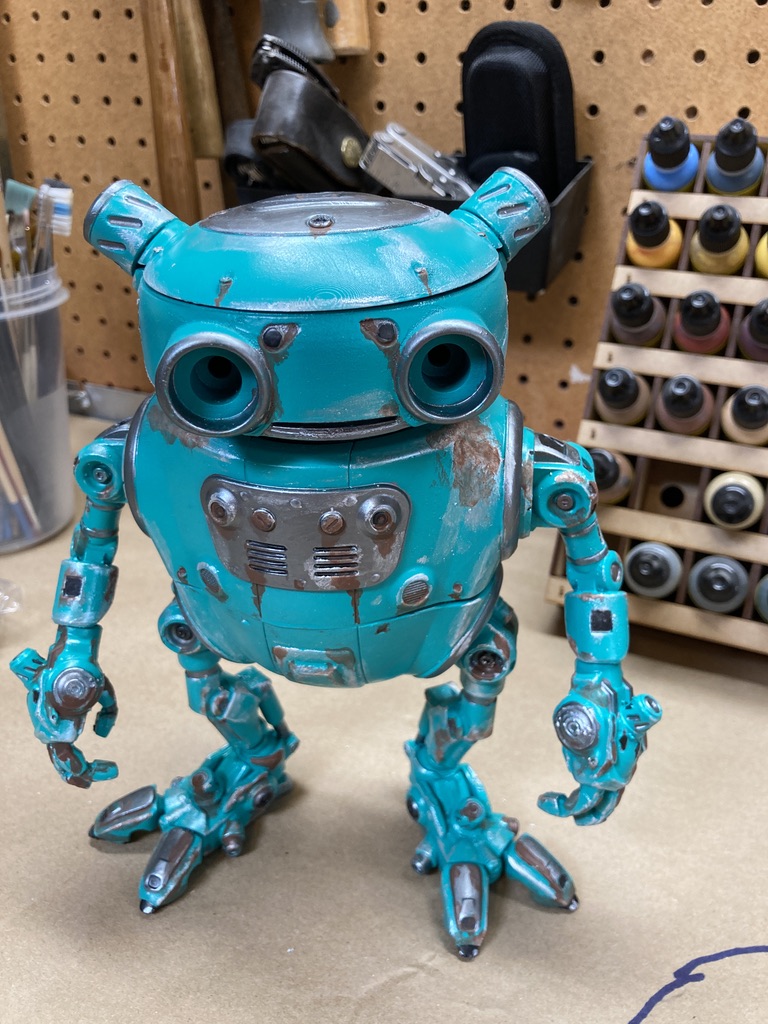
The next stage involved a paintjob for the teal and silver, as if he’d just rolled off the assembly line. The teal was done with an airbrush and the silver hand-painted.


This is fine, but just too clean! I really liked some of the paintjobs I saw that other folks did using the Adobe Substance Painter (meaning it was all virtual). Here are a few:

There is something about that post-apocalyptic, weathered look that I really enjoy, so I wanted to do something similar with mine.
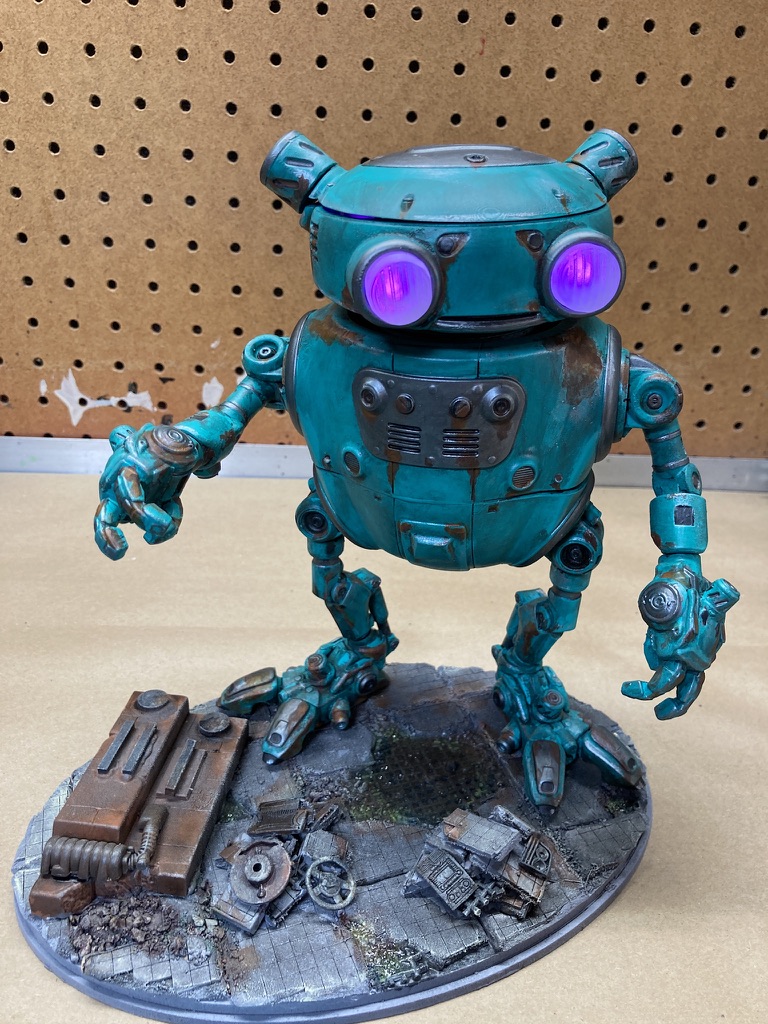
The next step was a rust and wear pass. That’s where the rust colors and the silver is used to indicate wear and tear:
Before I went off and did more weathering, I wanted the robot to have a base, so I constructed one from scratch. It’s made of multiple levels of MDF. There is a base layer, a slightly smaller middle level and then I cut some pieces that I thought might look like floor plates. The goal was to go for something worn and weathered. I also added a 1/8″ piece of steel rod which I cut and set with epoxy in the base. I also drilled out the base of one foot to secure it to the base but still allow the robot to be removed if necessary. I also added some grid where the tiles had rusted away and I experimented with a water effect epoxy just for a different look and texture. The piles of debris were broken MDF tiles and some bits and bobs that I’ve collected.

After that was the weathering pass which was done with a mix of black and burnt umber water-soluble oils which were applied and much of it wiped off, leaving the colors in the crevices to indicate exposure and oil and just general exposure to weather and abuse. This was all sealed with a clear satin lacquer to protect the paints.


The final step was to add some lights for the eyes. I had purchased some inexpensive “fairy lights” from Amazon for another project that were made up of a string of micro-LEDs powered by a watch battery. All I had to do was remove the unused lights and place them inside the space in the head. I even had the choice of some colors for the eyes. Originally I was thinking white or maybe red, but the purple that I tested with was kind of cool. I also added some parchment paper between the lights and the translucent resin to diffuse the lights a bit. But, it’s a nice effect!
This was a fun project! I really enjoyed (mostly) printing my own model and especially the painting and weathering and making the base.
My thanks to Paul Braddock for the great model.


0 Comments