This is an older one, but I liked the results and I think it was a pretty keen project.
Inspiration for this was an article on Instructables about Sun Jars.
At the time I saw the article, I was looking for a Christmas gift project and this seemed like a good fit.
The original article used some tracing paper and glass frosting spray to achieve the effect, but I thought that might not hold up well, so I wanted to try something else.
Additionally, I couldn’t find the Ikea jars mentioned.
My start was a trip over to my home products store to see if I could find a comparable jar. I did find one that I thought would suit, but could only find a couple at that store and I knew my goal was a dozen for gifts.
A total of three stores and some gas later I had my dozen jars.

Jars
Next step was to head off to my local home improvement store in search of solar outdoor lights. I traveled with jar in hand because I had to figure out if the light, when modified, would fit in the lid of the jar.
I ended up with a couple sets of lights that looked like they’d do the trick

Lights
Since I was only interested in the solar part: the panels, the rechargeable battery and light, much of the rest of the light was unnecessary to the project.

Parts!
Next step was to take them home and “modify” them to fit my jars. This was done thought the wonders of a Dremel tool.
A word of warning here: I’m not convinced, in retrospect, that this was the brightest or most effective way to go, but it worked. There was a lot of bits of cut black plastic all over after I was done. Cleanup took a while. But the result looked like it was going to fit just fine in the jar.

The next step was to try and figure out how to frost the glass in the way I imagined. I looked in to the spray but didn’t like the look on the glass.
I also thought about the paper route, but was ultimately unsure it would hold up or last.
In the end I went over to my local craft store and purchased a nasty chemical concoction whose sole purpose it to etch the glass.
While this worked, it’s a pretty caustic mix, being mostly acid and some grit. The effect, though, was more or less what I wanted so I went with it.
The final interesting challenge was how to attach the modified lights to the lid in the jar. While it fit pretty well, I needed something to seal it. My initial attempt was simply electricians tape. It looked fine and I figured the close fit would be sufficient.
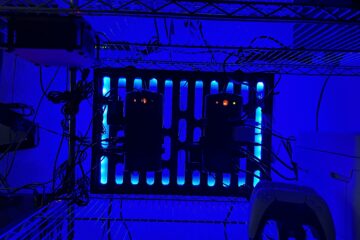
After a few more hours work, I had completed the project and was very happy with the results.

Final Sun Jar
Update: It’s been two years since this project and I have more insight in to how the end result holds up.
Two things I’ve learned:
1. The jars don’t like to be jostled and knocked about, like if they are left on a porch or dropped off a porch railing. The batteries are likely to pop out and require taking the jar apart to fix.
2. The second thing I learned is that after a winter outside, electricians tape really gets kind of gross and loses it’s effectiveness. Note, this may be limited to cheap tape, I’m not sure. Ditto duct tape. Next I tried clear silicone. It stays less rigid, but doesn’t hold things together that well. My latest attempt was automotive gasket sealer and while that worked pretty well, it’s still subject to some wear.
3. The jars are also not sealed since the jar seal had to come out to get things to fit. This can result in condensations and/or water getting in the jar. Nice effect, perhaps, but not the intended presentation.
That’s it. After two years, I’m still pretty happy with the results of this project.
0 Comments