 |
||||||||||||||||
Tutorial: Displacement Maps -or- The 30 minute Do-It-Yourself Garbage CanSeptember 13, 2000 |
||||||||||||||||
|
So, I was reading a great book I saw referred to on the A:M list recently ([digital] Lighting and Rendering) and saw a neat picture of a subway scene. Long story short I got to thinking about modeling a garbage can. What's the best way to build such a thing? Turns out, as with most good things in A:M, there's more than one way to skin that cat. This tutorial will discuss a few of the pros and cons of the three approaches I came up with. This tutorial is simple but hopefully will save someone some time or spark a new approach to solving a problem. Modeling a garbage can like the one in the image above can be done in (at least) three different ways:
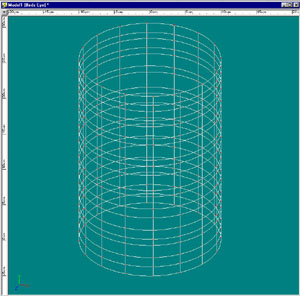
GeometryIf you look at the image above, you can see that there is a fair amount of detail in the ribbing on the sides and round the top and bottom. You could certainly model all that, but given that I also wanted to add some imperfections, doing that on a CP by CP basis didn't seem attractive. Plus I was looking for an opportunity to try out a mapping solution. Geometry is not a solution to overlook, but let's see what else is available. Bump MapsHere is the basic mesh for the garbage can. It's just a simple line lathed with 16 cross sections.
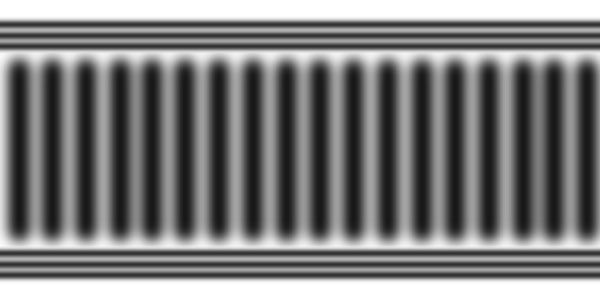
Maps or decals can be used for a wide variety of things including altering the geometry of an otherwise smooth mesh. The method I see most often is the Bump map and that's what I started off with. Since this is a decal the first step was to prepare the decal. Here is the basic decal I started with to emulate the bumps in my can. This is a basic pill shape replicated with a light Gaussian blur applied to the top and bottom portions and a larger blur applied to the pill shapes. Then a noise filter was applied to the entire image. Remember that Bump maps have to have a smooth transition between lighter/darker (or vice versa, thus the blur) to work correctly and look good.
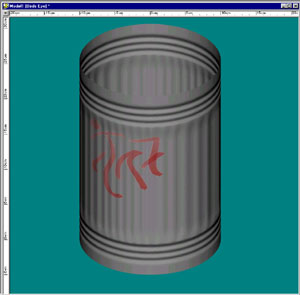
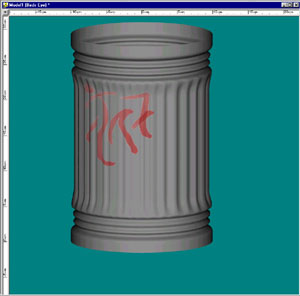
This decal can be applied in a couple different ways. You could create a new material and make it a projection map and choose the cylindrical mapping. Another option is to flatten the front and back halves and apply the bump map decal to front and back. This is the option I chose. I won't go into the details of flattening since others can explain this powerful yet mystical feature better than I. The results of applying this and a simple graffiti color map image came out like this:
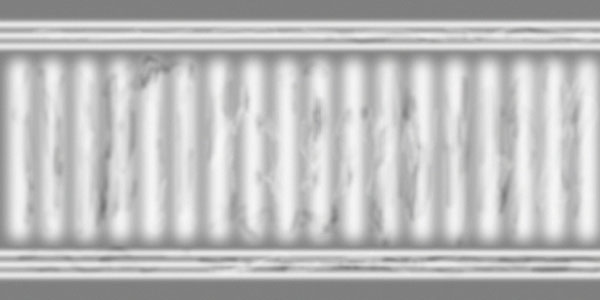
Now, this is the above bump map applied at about 800%. The indentations are about the right size but note something about the sides. The bumps don't actually alter the mesh along the top and bottoms as you might expect. From the A:M Manual: "Because bumps maps do not actually change the shape of the underlying surface (they are more of a visual trick), the surface’s profile shape is not affected. An otherwise irregular bump map will still appear smooth when viewed along the surface’s profile." So, while bump maps give us the general appearance that we're looking for, the edges just don't look right. For that reason a bump map is probably not a great solution for this problem is I actually want to see the detail. So, what about Displacement Maps? Displacement MapsDisplacement Maps are another decal type. Again from the A:M Manual: "Displacement maps actually affect the object’s surface, making real bumps but they are computationally and memory expensive, and are also more difficult to control." So, the basic idea is that any color value less than (lighter than) 128 will displace into our can and value greater will displace out from our can. So, back to our image. First I had to invert and normalize the colors so the white had a value of 128. I got odd looking results if I didn't do this. I also decided to go nuts on the imperfections and severly mucked around with the original image. Here is the result:
Now something interesting I discovered is that while decals support the displacement type, unfortunately the Projection Map material plugin seems to support all decal/map types except displacement. So, this is the real reason I chose to use the flatten/decal approach mentioned earlier. Now I can take my previous decals, change the image to this new one, change the type to Displacement and set it to a value of about 1.2%. 100% will result in a severely bloated garbage can. Since displacement is measured in centimeters (cm) you only need a small value for our mesh. So, how are we doing?
Okay, Ewww. That's not good. How come? Well, a bit of research and some serendipitous reading of Jeremy Birn's "Lighting and Rendering" book mentioned that displacement maps depend on a mesh with more complexity. Aha! So, let's build a better barrel (more patches is better):
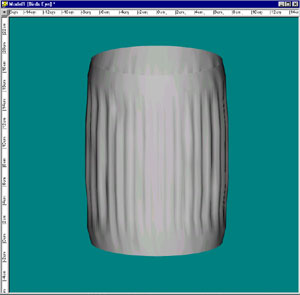
How many is enough? I dunno. You'll need to experiment based on your model and application. So, now that we've altered our model, how are we doing?
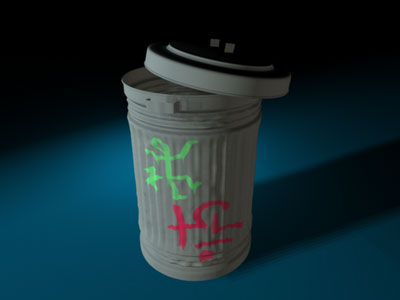
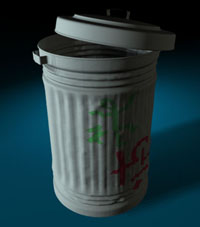
(Actually this uses our displacement map before I "dirtied" it up, so it still looks a bit perfect, but you'll see where we're going in the final render.) So, we're getting there! Now we have our detail and as you look at the profile we have the detail actually affecting the profile of the model, which is much nicer. So, with just a simple image map applied as a displacement map we've emulated a much more complex model in much less work (which is a good thing). Let's toss this bad boy into a simple choreography, throw on a few handles, a bit more graffiti and a lid and see what we have:
Note how the changes in profile and dents catch the light and shadows as you'd expect. That's cool. ConclusionI'll leave to the reader the additional fun of adding diffusion and specular maps. You probably ought to consider adding some scuff marks and discolorations, too, since this is a pretty clean looking garbage can, but not bad for a simple cylinder and a simple map, right? Keep in mind that Displacement Maps will consume more memory and time during rendering but the results can be well worth it. Hopefully you'll find an application for displacement maps in something you're working on and I hope this helped. Thanks, Darrin Mossor If you have any feedback, additions or corrections please let me know and I'll fix it. |
||||||||||||||||
|
|
||||||||||||||||
|
This document maintained by
webmaster@mossor.org. |